Tips and Tricks
This page contains some tips and tricks for preparing your proposal.
Doing polarimetry
The Polarimetry Observer’s Guide includes a description and capabilities of the various modes, how to construct a proposal, use the PIPT to define polarimetric observations, calibrate and analyze data using the polsalt pipeline. Additional detailed description on the polsalt pipeline can be found in the Github Wiki: https://github.com/saltastro/polsalt.
Calculating the Position Angle (PA) for longslit observations
It is common to request a specific PA for longslit observations, e.g. to ensure a reference star is on the same slit as your object or to investigate sptially resolved emission from extended sources. Some observers will want the parallactic angle to maximise the throughput and this can be specified at SALT with a checkbox in the PIPT. Otherwise, choosing a PA is best done by downloading imaging that has a good world coordinate system, e.g. SuperCOSMOS Sky Surveys, and loading this up in a FITS viewer such as ds9. Some care is needed when calculating the PA, to illustrate this we use ETHOS1 as an example of an extended source, a planetary nebula with two jets. The accompanying image shows the SuperCOSMOS B_J image with the desired position of the slit drawn with the ‘line’ region tool of ds9 (choose 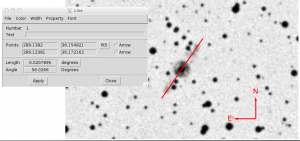 Region menu->Shape->Line and then click and drag your mouse in the image to draw the line). Regions are used to annotate images as well as several other powerful capabilities in ds9. The line properties are accessed by double clicking on the line, bringing up a dialogue box (as seen in the image). It is essential to select WCS (fk5) for the PA calculation to be correct. Now, the PA is measured anticlockwise from North, where N=0 degrees. The angle given by the line in this example is 56 degrees in the conventional sense where West = 0 degrees. So to find the PA we add 90 degrees to get PA=146 degrees. Be aware that depending on how you draw the line, the angle may be 180 degrees more. It is also good practice to only specify non-negative PA. To check your new PA you can use the finder chart tool to see if the PA you’ve calculated seems reasonable.
Applying for time as a PI from an African institution
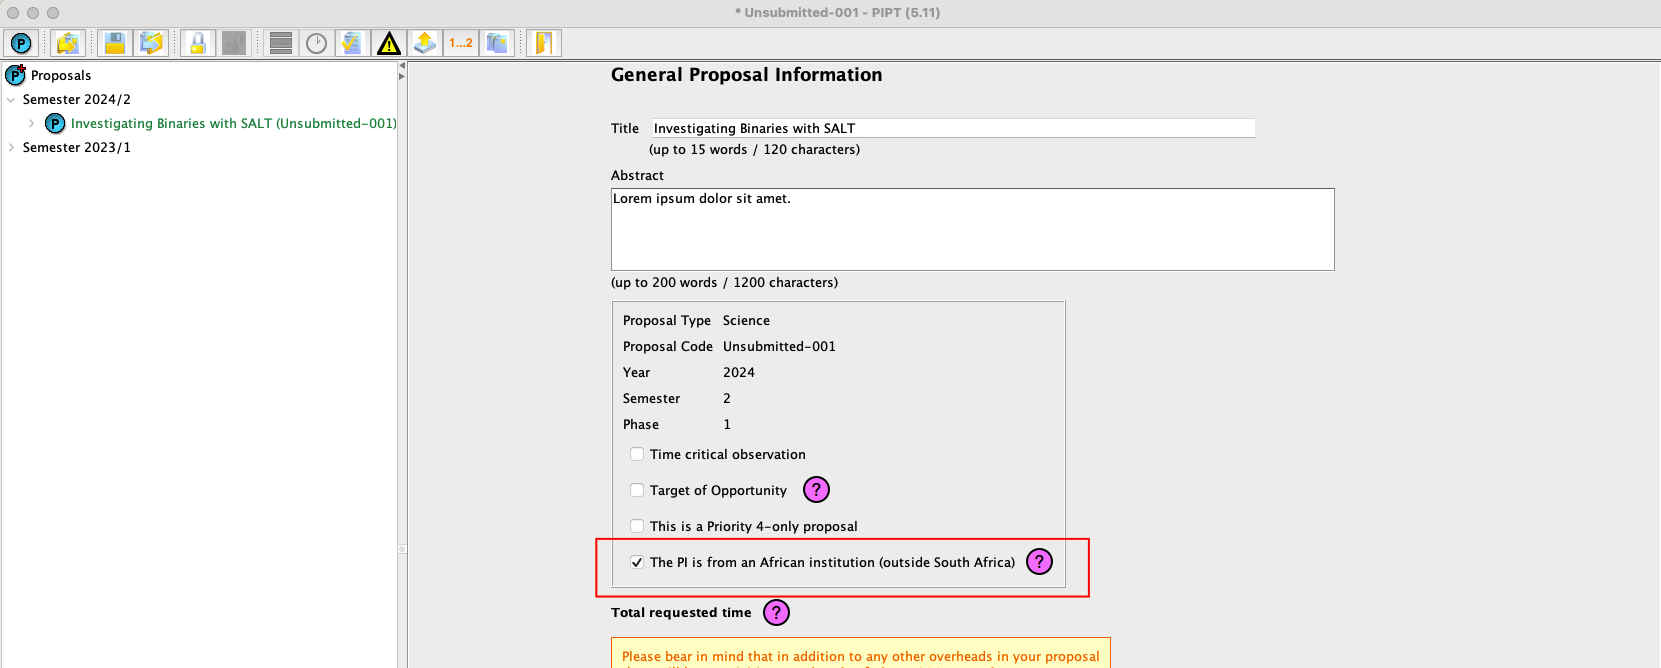
If you are affiliated to an institution in Africa (but outside South Africa) and are the Principal Investigator on a proposal, you may request SALT observing time even if no investigator on the proposal belongs to a SALT partner. To do so, make sure you are using the latest version of the PIPT (5.11 or higher) and indicate on the General Proposal Information tab for your Phase 1 proposal that the PI is from an African institution, as shown in the screenshot. You can then request time from the partner “Other”.
Your time request will be considered by the South African Time Allocation Committee.